
Check out our Tips for Working Your Pending Queue and Pending Degrees Checklist for some quick tips and suggestions to help you efficiently manage your pending queue.
To access and work through your current pending queue:
1. Click on the Verification Services tab.
2. You will land on your Verification Services Dashboard
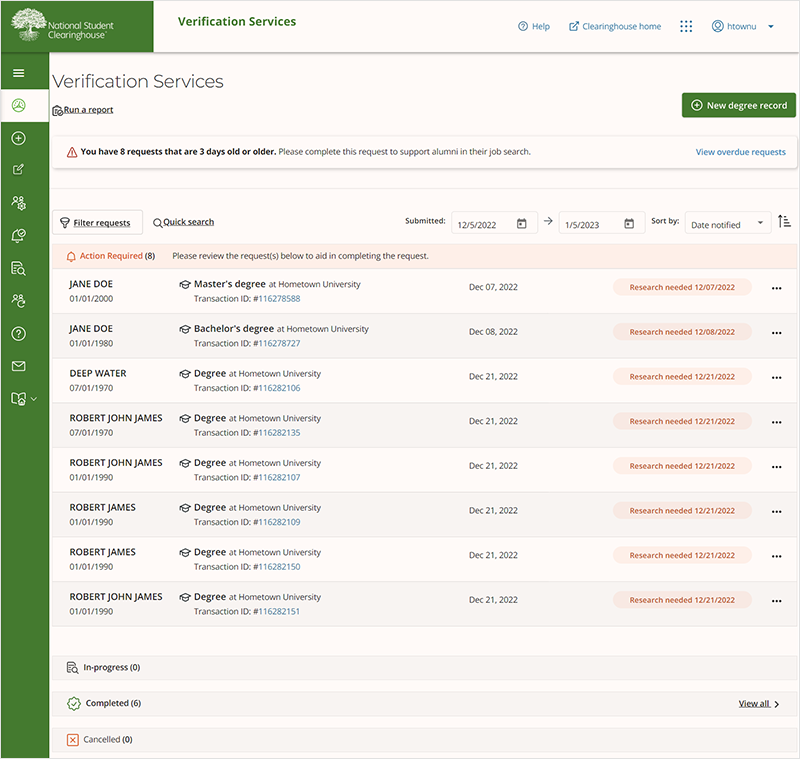
On the Verification Services Dashboard, your current pending verification requests will be displayed at the top of the page under the Action Required section with an expanded view. They will be marked with the status of “Research Needed” along with the date on which the request went into this status. You may select “View All” on the right side of the beige banner to see the remaining requests.
Verification requests are sorted from oldest to newest to help prioritize the oldest requests first. Each row represents a single verification request for an individual student and provides basic information regarding that specific request. To view the full request, including options for completing a verification, you may select the transaction ID number within the row you wish to open, or the ellipses (…), and then “View details”. If you need to navigate back to the dashboard at any time, you may do so either by selecting the dashboard icon (![]() ) or the back button on your browser.
) or the back button on your browser.
Note: For more information on the other sections included on your dashboard, visit the Using the Verification Services Tab section.
To access and work verification requests by type, also see sort and filter pending verifications.
3. To access and work a request, click on the transaction ID within the row you wish to focus on.

4. Once you navigate to an individual request, you will see two sections; a Request Status section on your left, and a Request Details section on your right.
- Request Status (left): Includes the current status of the request, degree levels being requested (if applicable), and whether the Clearinghouse has identified any potential matches in our system.
- Request Details (right): Includes the student information which the requestor is trying to verify. This information should aid you in your research.
Individual request page with no degree level or potential matches:
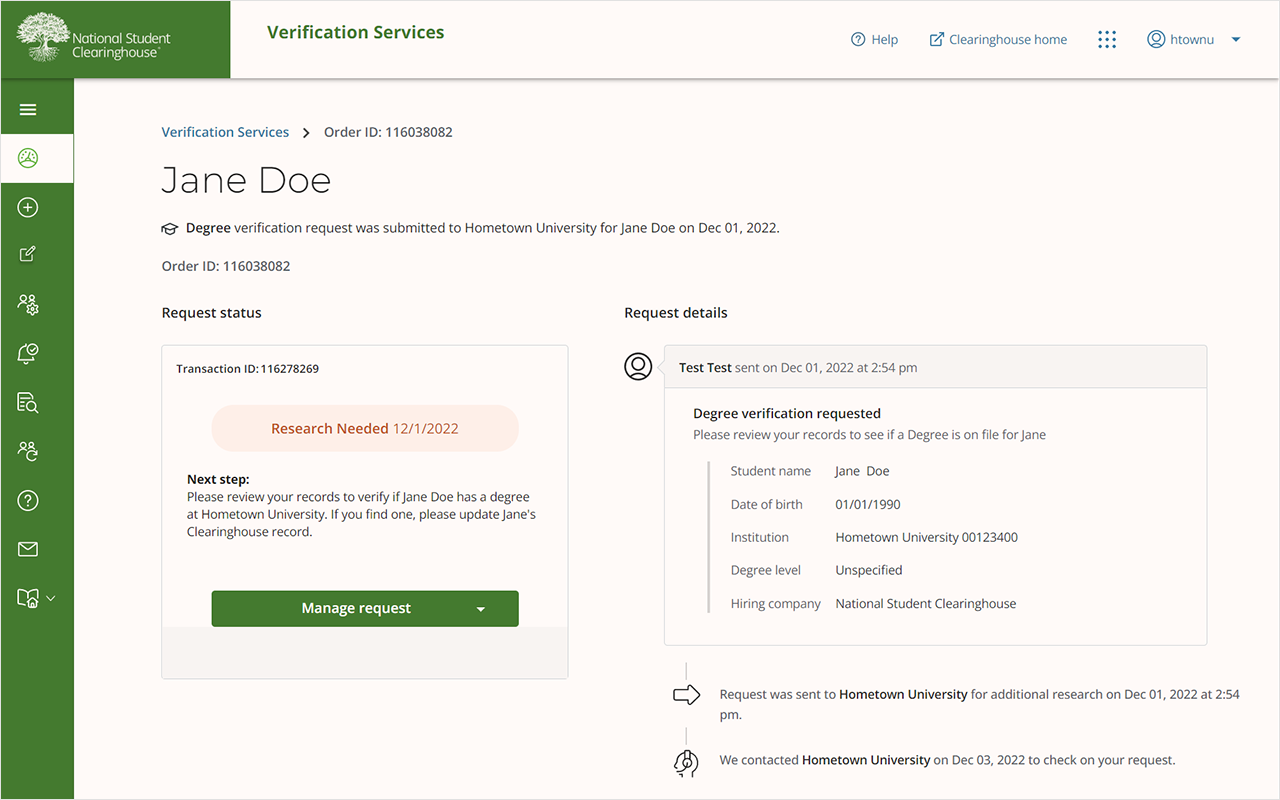
5. To view options to close a request, select the Manage Request button at the bottom of the Request Status box.
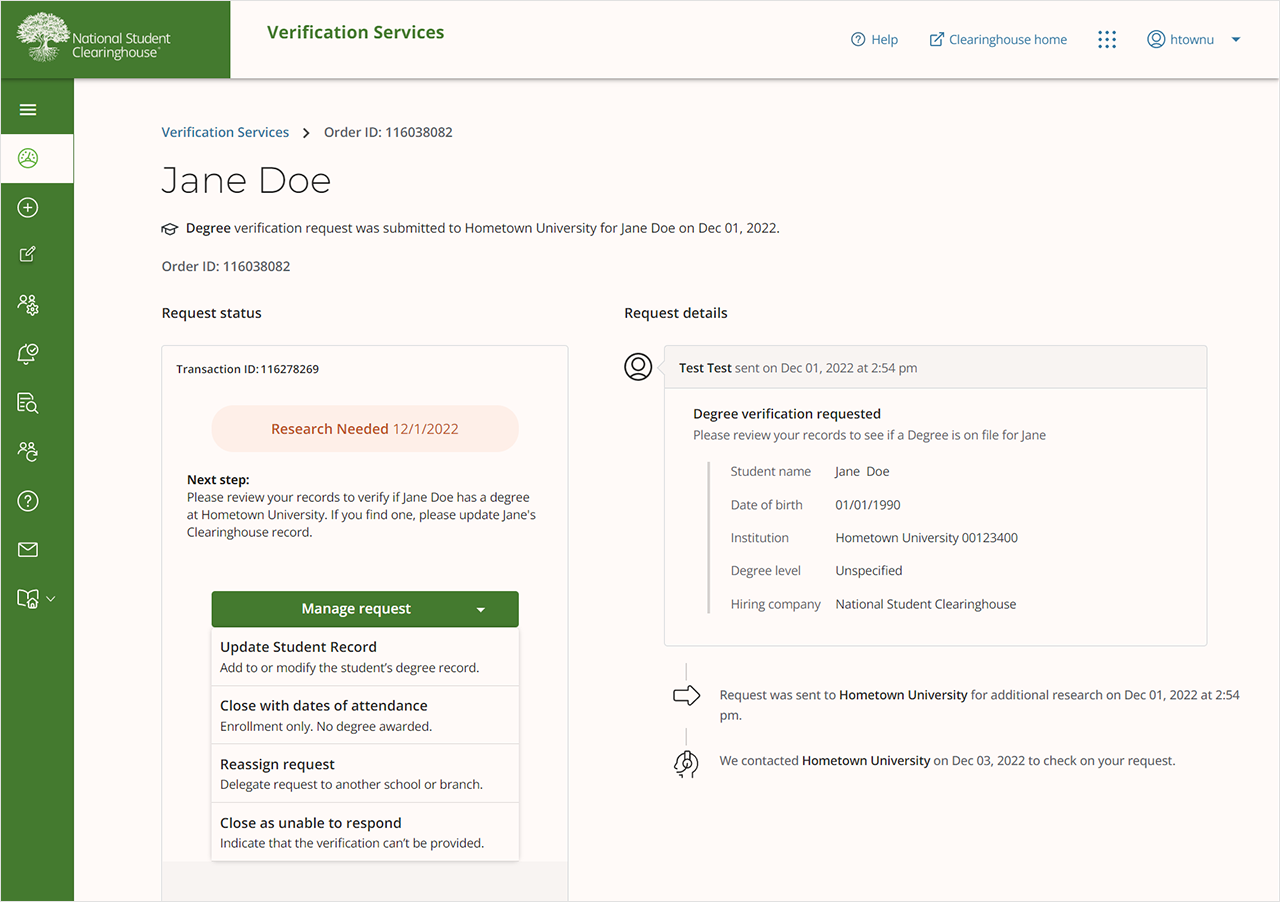
6. The Manage Request options presented may vary depending on whether a degree level has been indicated or if a potential match has been identified in the Clearinghouse database.
For most requests, you will have four options to close a request:
- Update Student Record: Use this option if you have located a student with degree record(s).
- Close with Dates of Attendance: Use this option if you have located a student with enrollment information, but no degree records.
- Reassign Request: Use this option to reassign to another school or branch.
- Close as Unable to Respond: Use this option if you are unable to locate a student match at your school (no enrollment or degree details found).
