
To help you work your school’s pending requests under Verification Services, we’ve provided helpful tips and suggestions to make the process easier. Also, be sure to read the DegreeVerify Pending Checklist to help you efficiently manage your pending queue.
How Do I …
- Sort and filter pending verifications?
- View information provided by the requestor?
- Add a new student record with degree(s) or dates of attendance for a Pending Verification
- Ensure that accurate data is provided?
- Use the “Institution Awarding Degree” field?
- Enter dates in the correct format?
- Process degree requests when only Dates of Attendance (DOA) or Enrollment is available?
- Confirm an anticipated graduation date?
- Select potential matches?
- Provide comments to the requestor?
- Use the Social Security number on the request?
Sort and filter pending verifications
Sorting:
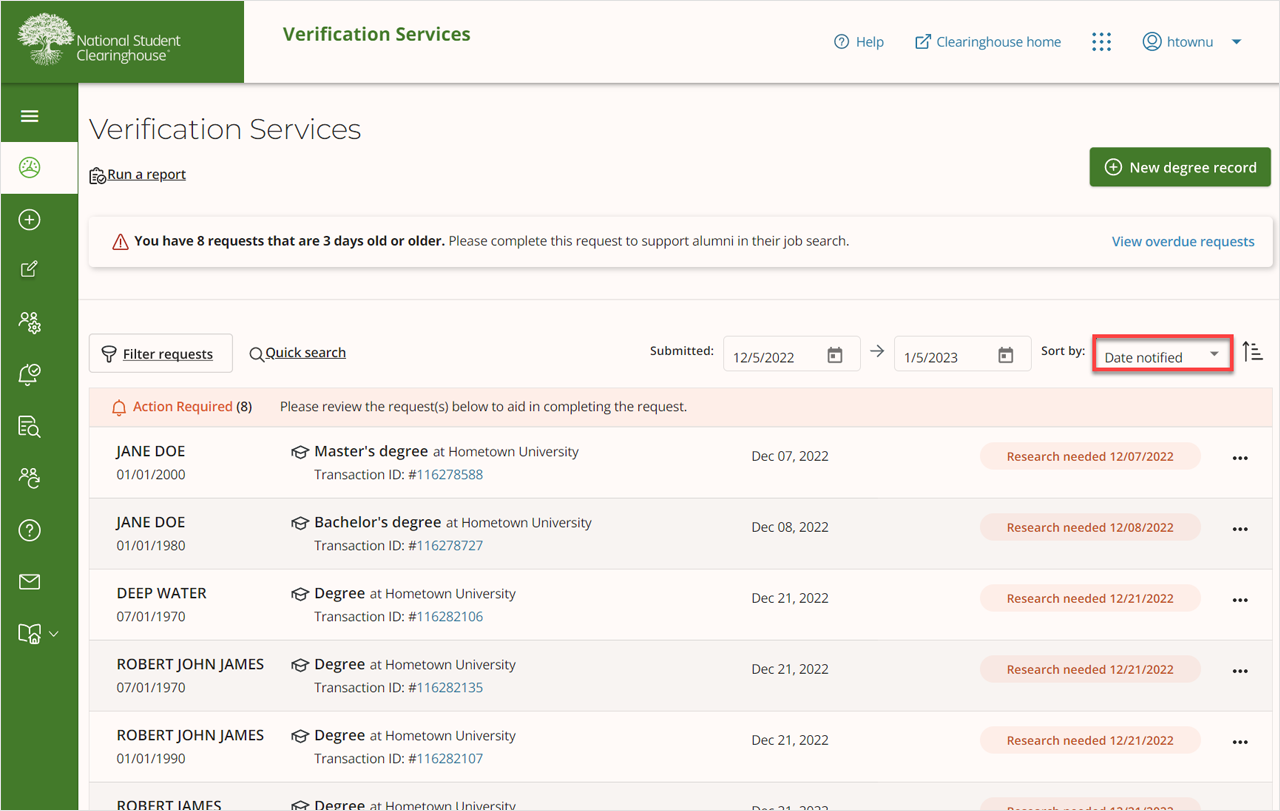
Be default, your pending verifications are sorted so that the oldest requests are at the top of the Action Required section. The oldest pending requests should be completed first and considered top priority. To change the sorting order to show newest first, just select the icon next to the “sort by” field. There are also five different “sort by” options you can select from:
- Date Notified: The date the request was placed into its current status (typically “research needed). This is the default sort type.
- Original Request Date: The date the verification was originally requested
- Student Name
- Transaction Type: Degree verification or Dates of Attendance verification
- Transaction ID
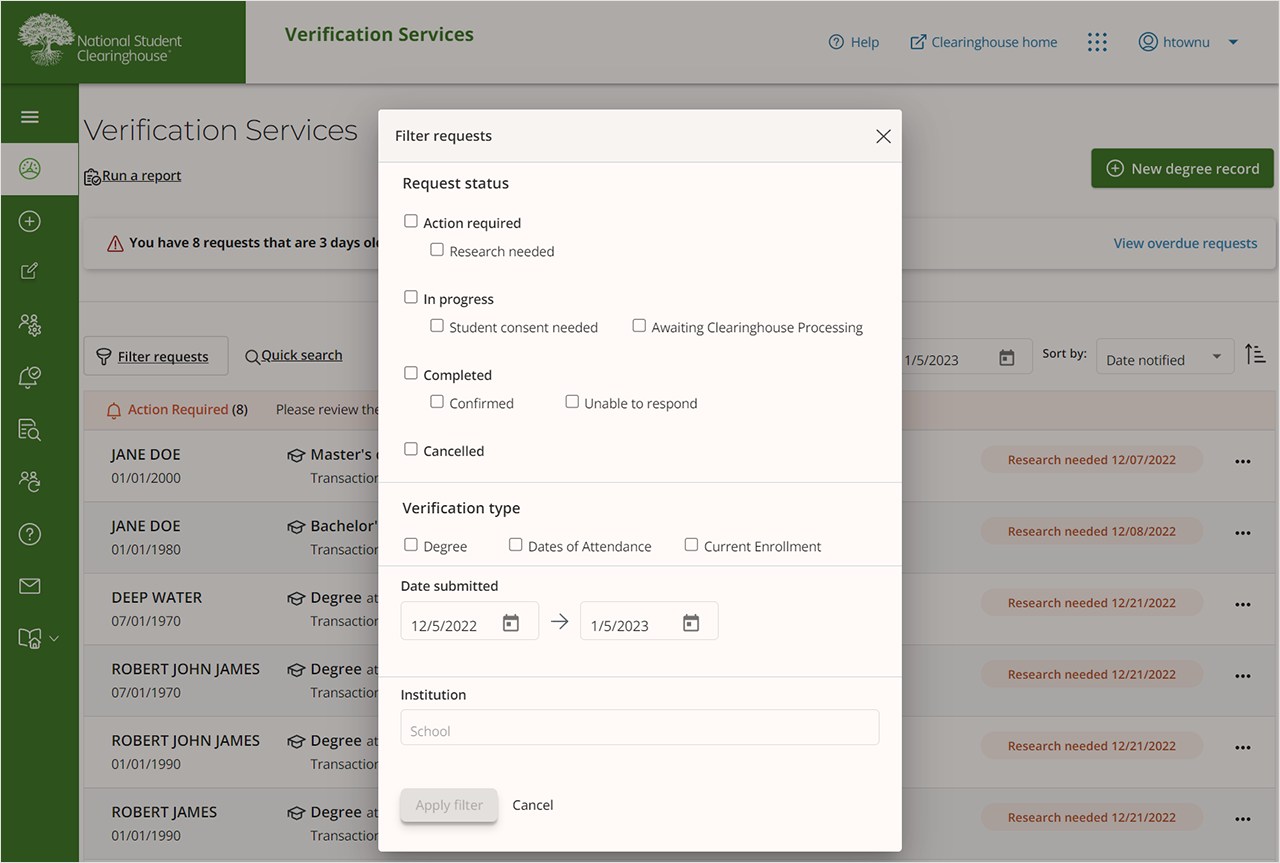
Filtering:
You can filter your requests by selecting the “Filter requests” option on the top left of your dashboard. Then you can choose to filter by request status, verification type, date submitted, and institution.
View information provided by the requestor
From the dashboard, click the transaction ID for the request you want to see details for. The information at the top right of the screen under “Request Details” is what the requestor has provided. When you select Update Student Record or Close with Dates of Attendance from the “Manage Request” options drop-down, you will move to the “Student Record” page. Any information provided by the requestor will be pre-populated in the “Student Information” section.
Add a new student record with degree(s) or dates of attendance for a Pending Verification
When you have located the student’s record in your database, select one of the following “Manage Request” options to enter the student’s information.
- Update Student Record: Use this option if you have located a student with degree record(s).
- Close with Dates of Attendance: Use this option if you have located a student with enrollment information, but no degree records.
Only the fields marked with an asterisk are required; however, we ask that you also complete the other fields when possible.
Note: Manage request options are dynamic and may have different options when a degree level is requested or potential matches are located. See Degree-Level Filtering or Potential Matches sections for more information.
Ensure that accurate data is provided
Please submit the information as it appears in your records, not as the requestor provided. For example, if a requestor entered the first name as John, and you have found a match based on the other identifying information provided, but your records show the first name as Jonathan. In that case, please enter the name as it appears in your records on the “Student Record” page.
Use the “Institution Awarding Degree” field
The “Institution Awarding Degree” field in the Degrees on Record section on the Student Record page is not intended for the school’s official name. This is where you can select the field name from a drop-down menu, such as “School of Nursing,” “John Smith School of Business,” or “College of Arts and Humanities.”
Enter dates in the correct format
If you prefer, you can type in the date of birth and dates of attendance rather than using the dropdown menus. Use the Tab key on your keyboard to jump from field to field. The Degree Award Date and Dates of Attendance should be entered in mm/dd/yyyy format.
Process degree requests when only Dates of Attendance (DOA) or Enrollment is available
If the requestor submitted a degree verification, and your records indicate that the student attended but has not earned a degree, select Close with dates of attendance from the “Manage Request” drop-down. You will then navigate to the Student Record page where you will see “No degree awarded” already selected and only the fields necessary to close the request with dates of attendance present. Enter the student’s dates of attendance along with the projected graduation date and major, if possible.
Confirm an anticipated graduation date
If the requestor submitted a degree verification, and your records indicate that the student attended but has not earned a degree, select Close with dates of attendance from the “Manage Request” drop-down. You will then navigate to the Student Record page where you will see “No degree awarded,” already selected and only the fields necessary to close the request with dates of attendance present. Directly below the attendance fields, enter the date on which the subject is anticipated to graduate in the optional Projected Graduation Date field.
If you do not know the exact date, we suggest you provide a date occurring mid-to-late month. Providing a later date discourages requestors from attempting to re-verify the degree too soon in the degree conferral process. Then, enter any comments and click Submit.
Select potential matches
If our system is not able to exclusively match a record but locates records that are closed to matching, you may be presented with “potential matches”. If presented with potential matches, please review all matches carefully, as they can contain different students who have the same or similar names, dates of birth, etc. If one of the potential matches appears to be the correct student (but may be missing information you have in your records), select the record, then choose the applicable Manage Request option:
- Close with selected student record: Closes request with degree(s) listed
- Add new degree(s) for selected student: Allows you to modify the student record details and/or add an additional degree for the potential match selected.
If none of the potential matches reflect what is in your records, ensure no records are selected, then select the applicable Mange Request option:
- Add new student with degree details: Allows you to add a student record and degree record(s).
- Add new student with dates of attendance: Allows you to add a student record with dates of attendance information, if no degrees are on record.
- Close as unable to respond: If you are unable to locate any student records, use this option to indicate that a verification can’t be provided.
If you determine the request needs to be sent to another school or branch, you can use the Reassign Request option and select the appropriate school/branch in which to send the request.
Provide comments to the requestor
A comment can be selected and added to the verification response from a drop-down menu for any transaction that has a “Research Needed” status. Any comments you select are sent to the requestor, but they will not be included on the verification certificate or on the student’s degree/enrollment record if provided.
The Clearinghouse has two types of requestors: public site and contracted. Public site requestors do not have the ability to provide the student’s Social Security number; some contracted users can provide the student’s Social Security number, depending on their service agreement options with us.
