
- Change Expired Password
- Manage Users
- View Deleted Users
- Apply for Sales Tax Exemption
- User Role Types
> Change Expired Password
Due to security reasons, your password to the Clearinghouse secure site will expire every 90 days. On or after the date of expiration, you will be prompted to change your password upon successful login to the Clearinghouse secure Web site. Once you agree to the user terms and conditions, you can submit and save your new password. You will then be asked to review or create security questions and answers.
You can also change your password anytime via Edit Your Account in the right menu, the Account Management tab, or the “My Account“ link.
> Manage Users
The user administrator (if your organization has a Clearinghouse account) has the ability to add new users and manage their users online anytime. If you do not have administrator privileges, you will only be able to view and change your own account information.
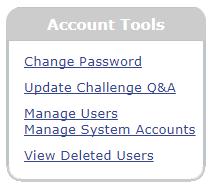
1. Click either the Account Management tab or Edit Your Account under the right menu (you can also click “My Account” link in the upper-right corner). Select Manage Users under the Account Tools menu (this option is only available for the user administrator).
2. Read the Terms and Conditions and click I Accept. (You will be required to read/accept this document for each new session.)
To Create a New User:
1. To create a new contact, click Create a New User.
![]()
2. Complete the “Personal Information” section, and click Submit >. The user administrator is prompted to assign roles for the new contact. You can also add a Web ID, if you assign Web access to the individual.
To View, Edit, or Delete an Existing User:
1. To view/edit account information for an existing contact, click on any contact name on the page.
2. To update personal details, edit the fields under the “Personal Information” section.
3. To update his or her service roles, you can check or uncheck any of the options under the “Roles” column. If you hover your mouse over each role, you will see a brief description.
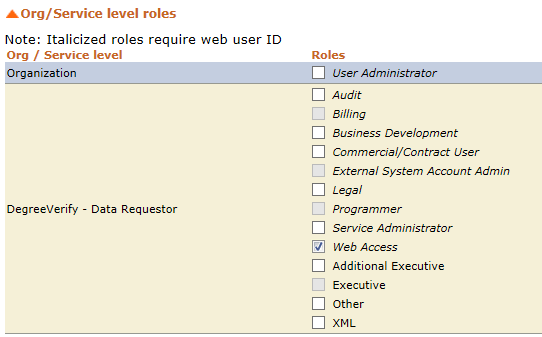
For required and one-time-use roles, see User Role Types.
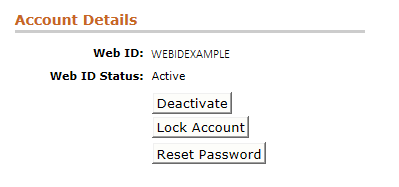
4. Under “Account Details,” you’ll see the current account status for this person. This section enables you to add a Web ID (three to nine characters long) for new Web users.
5. Click Submit to save all changes.
6. After access is added, the options under “Account Status” will appear. To remove access to an old account that is no longer being used, click Deactivate. If it is already deactivated, you can click Activate. To lock an account, click Lock Account. If it is already locked, click Unlock Account to restore access. Accounts become locked after invalid login attempts. The best practice is to also Reset Password when unlocking an account.
7. To delete a user, click Delete User Profile under the “Personal Information” section. You will be alerted if a role needs to be reassigned prior to the user’s deletion. The user’s Web ID cannot be reused. If you deleted this user in error, you will need to recreate the user as a new contact.
8. You will receive two pop-up notifications, if the user is deleted. Then you’ll be redirected to the Manage Users page for your organization.
> View Deleted Users
The user administrator (if your organization has a Clearinghouse account) has the ability to view a list of your organization’s deleted users.
To view a list of deleted users:
1. Click either the Account Management tab or Edit Your Account under the right menu (you can also click the “My Account” link in the upper-right corner).
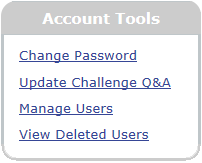
2. Select View Deleted Users under the Account Tools menu (this option is only available for the user administrator).
3. A list of the deleted contacts from your organization is displayed. In it, you’ll find their Web IDs, their deletion dates, and the Web ID of the person who deleted each user. This page can be filtered or sorted.
Note: This page is automatically sorted by time stamp from newest to oldest.
> Apply for Sales Tax Exemption
If your organization is sales tax exempt, you will need to :
1. Be a registered Verification Services user,
2. Add your billing information to your user profile, and
3. Provide a sales tax exemption certificate to the Clearinghouse.
Typically, tax exemption statuses are valid for three to five years, after which the billing contact will be required to reenter the certificate.
Sales tax for verification transactions is only applicable for the following states: New Mexico, Ohio, South Dakota, Texas, and West Virginia. If your credit card billing address is not located in a taxable state, you will not be charged sales tax on your transactions (for Clearinghouse account holders, this applies to the billing contact’s main address).
IMPORTANT: All unregistered Verification Services users will be charged sales tax if the billing address of the credit card used for payment is located in one of the taxable states listed above.
How Registered Users Can Apply for a Sales Tax Exemption
If you are a registered Verification Services user, you can apply a sales tax exemption to future transactions using the following steps:
1. Click Edit Your Account under the right menu. You can also click the Account Management tab or “My Account” link in the upper-right corner.
![]()
2. Update your billing information in your account profile. Below the address fields, select the option, “Sales Tax Exempt,” so you will not be charged for applicable sales tax on future transactions. (Checking the box does not guarantee you will not be charged sales tax for your transactions. To be recognized as sales tax exempt, you must also submit a sales tax exempt certificate for review and processing by the Clearinghouse, as explained in Step 3 below.)

Click Submit in order to save these changes to your account.
3. If you are in one of the taxable states, you will receive an email with a Web link where you can complete an online sales tax exemption certificate through Avalara (AvaTax). Click the link and follow the instructions to add your information and sign an online certificate. You will be notified via email confirming that your certificate has been submitted to the Clearinghouse. You will continue to be charged sales tax until your sales tax exemption certificate has been received, reviewed, and processed by the Clearinghouse.
Certificates cannot be uploaded; in order to be approved, you must use the Avalara (AvaTax) form wizard as directed.
> User Role Types
- Additional Executive: The secondary contact for the contractual relationship with the National Student Clearinghouse.
- Audit: Point of contact for quarterly audits of activity. Requires a Web ID.
- Billing: The contact for Clearinghouse invoices.
- Business Development: The contact for business development. Requires a Web ID.
- Commercial/Contract User: He or she can request Web verifications, view transaction history, and submit verification requests via XML. Requires a Web ID.
- Executive: The primary contact for the contractual relationship with the National Student Clearinghouse.
- Legal: The legal contact. Requires a Web ID.
- Other: A contact whose role is unknown.
- Programmer: He or she troubleshoots problems with the organization’s file format or file delivery. Requires a Web ID.
- Service Administrator: He or she is able to view and request reports regarding Verification Services. Requires a Web ID.
- User Administrator: This person is able to designate, manage, and remove user access to the organization’s secure Clearinghouse account and update contact information for non-Web users. By submitting requests, the user administrator authorizes the Clearinghouse to process them. Requires a Web ID.
- Web Access: He or she can access the Clearinghouse secure site. Requires a Web ID.
- XML: The designated contact troubleshoots problems with the organization’s XML file format or XML file delivery.
Helpful Tips & Reminders
Required Roles
- User Administrator
- Service Administrator
One-Time-Use Roles
- Billing
- Executive
- Programmer
Tips
- Once deleted, a user can be added back manually if needed
- User IDs cannot be reused